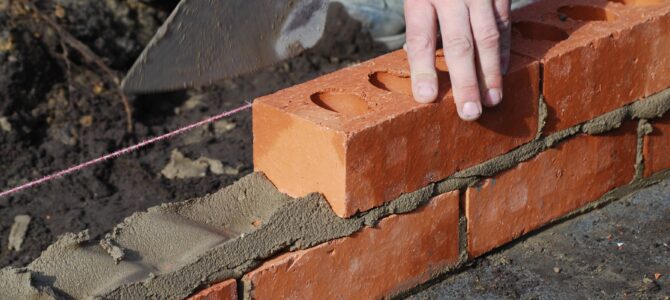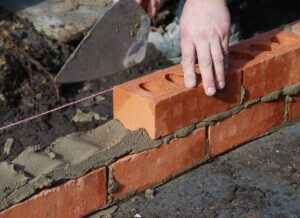
Stone Mason Charleston SC is a skilled craftsman who shapes stone for construction. They can also create intricate designs and carvings from stone. They work in various settings, including on construction sites and in workshops.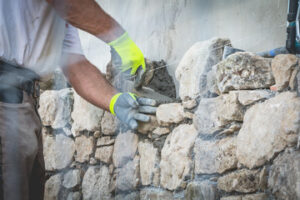
Many masons begin their careers with an apprenticeship. This typically lasts three years. Some learn on the job, but others take entry-level courses offered by colleges or other education centers.
You can become a stonemason by doing a full apprenticeship, which usually takes about three years to complete. You’ll work under the supervision of experienced bricklayers or stonemasons, and will receive at least 144 hours of classroom instruction on topics such as blueprint reading, applied mathematics, and layout work. Many people also learn the trade informally on the job, by watching and helping experienced workers. This can be quicker than an apprenticeship, but may not result in as thorough of training.
You’ll need to be good with your hands and have a strong sense of balance and stability to build or repair structures that are often tall, large, or irregular in shape. You should also be good at following technical blueprints and instructions from builders or architects. In addition, you’ll need to be able to do precise work with power tools and make careful measurements with a tape measure. You’ll also need a strong interest in the arts and creative skills to carve and design masonry pieces.
Some community colleges offer introductory courses in masonry that lead to a certificate or diploma. These courses typically include an internship or apprenticeship component, and guild or union membership is often required before you can get a job. If you’re unsure whether you want to pursue a career as a stonemason, you should speak with the instructors of these courses to find out how to get started.
Other training programs are offered by contractors and unions. These may be part of a formal apprenticeship, or they may be short courses (typically two to six months) that give you a taste of the profession and qualifications for working as a stone mason. For example, Priestman Associates LLP offers a Stonemasonry Traineeship that can lead to an NVQ qualification.
Some high schools also offer career-related training programs, such as the Construction Industry Training Board’s Foundation Apprenticeship Program. This can be a good way to start on the path of becoming a stone mason, although most employers will still prefer applicants who have completed an apprenticeship or college-based masonry course.
Tools
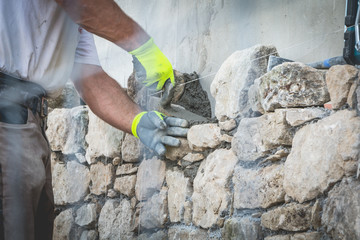
Masonry is a trade that requires a lot of hands-on work and sturdy tools. For this reason, masons should make sure they have personal protective equipment (PPE) such as ear protection, goggles, gloves and masks to protect themselves from dust inhalation and chemical irritants. Once they have their PPE on, the next thing they need are hand and power tools that let them shape, cut, grind, spread, and take measurements.
Some of the most important tools in masonry include a wheelbarrow and mortar pans, chisels, and a mason’s level. The wheelbarrow is essential for hauling bricks, decorative concrete pavers and other materials around a construction site. It also comes in handy when mixing concrete or mortar. A mortar pan is a large container that holds the mortar used in masonry projects. Masons use mortar to bind concrete, brick and stone blocks together. Depending on the project, masons may need more than one mortar pan to hold different sizes of mortar.
Chisels are metal or wood implements that a mason can hit with a hammer to chip away at stone. A typical chisel has a flat traditional face for striking and a tapered blade that can be used to cut bricks and cinder blocks. Masons can also use a cold chisel, which has a wide head for slicing bricks and veneer stones into pieces with a hammer blow. Cold chisels usually have plastic handles to absorb the shock of missed hammer strikes.
Squares are crucial to masons for measuring and building right angles. They can be fabricated from wood or metal and are used to mark off dimensions and set a plumb line. Masons can also use a mason’s level, which is a standard tape measure with brick spacing scales printed on it.
There are many other masonry tools that masons can use to complete construction projects, such as a v-notched trowel, which is used for heaping small amounts of mortar on a surface and spreading it evenly. Other types of masonry trowels include a margin trowel, which is used for placing thin amounts of mortar between the seams of stones, and a pointing trowel, which is used to tuck mortar into the seams of manufactured stone veneer.
Safety
Working with heavy and sharp tools, stone masons face a number of risks. Taking precautions and following safety guidelines reduces the risk of accidents and injuries. It also helps prevent costly mistakes that may require rework and additional expenses. For example, selecting the wrong type of stone or improper handling of tools can result in structural failures and water penetration. Regular inspections allow for timely repairs and help prolong the lifespan of the structure.
The most common hazard faced by stone masons is exposure to vibration when using hand tools. The vibrations can affect the bones, muscles and tendons in the hands and arms, causing numbness, loss of grip strength, pain, sensitivity to cold and other symptoms. Using less powerful tools and taking regular breaks can help reduce this risk.
Other hazards include the exposure to respiratory irritants such as dust and fumes from cutting, grinding and shaping stones. Stone masons should wear masks to protect themselves from breathing in these irritants and should take other measures to minimize contact with them. These measures include keeping work areas clean, storing chemicals properly and regularly inspecting tools for damage.
In addition, stone masons are at risk of injury from falling objects or being struck by stationary objects such as vehicles and power lines. Wearing a hard hat, staying away from overhead hazards and using proper lifting techniques can help prevent these types of injuries.
Stone masons also face the risk of musculoskeletal strain when lifting and moving large blocks of stone. Proper lifting procedures and using mechanical aids can help to reduce this risk.
Hearing loss is another hazard for stone masons. The noise from cutting stone can be very loud and can lead to long term hearing problems. Stone masons should wear hearing protection and take other steps to minimize exposure to noise.
Other risks include the potential for slips and falls, especially on wet surfaces. Workers should wear sturdy footwear and use anti-slip mats to minimize the risk of accidents. They should also avoid working outdoors during lightning storms and take other precautions to stay safe in these conditions.
Working Conditions
If you want to become a stonemason, you can start by studying on a college course or an apprenticeship. Entry requirements are not high and you can even find courses that allow you to enrol without any formal qualifications at all. Some of these are recognised by City and Guilds and you can then progress onto more specialised training and qualification later on.
Apprenticeship programmes involve spending time gaining practical experience on site and learning the craft from experienced masons. They will give you the skills and knowledge to work with a variety of different types of stone and develop your understanding of masonry techniques. Some schemes will also provide you with additional training in areas like masonry consolidation and dressing stone, along with health and safety, CSCS cards and more.
After you complete your apprenticeship, you can look for permanent work or join a larger construction company and get promoted into a position where you supervise other masons or other masonry workers. You can then move on to more supervisory roles or even become a project manager, overseeing whole building projects from conception to completion.
You can also choose to focus on a particular area of masonry and create intricate stone carvings or sculptures in your own workshop. This is a more relaxed and comfortable option that requires the use of specialised tools. Some stonemasons are self-employed and work freelance but this can mean that your income can vary depending on how busy you are at any given time and the amount of clients that you have.
Overall, the employment outlook for stonemasons is good. The demand for new structures will grow due to population and business growth and many existing bricklayers are expected to retire or move into other fields, leaving more opportunities available. This career does require a lot of physical labor and is often performed outdoors in all weather conditions so you will need to be prepared for this. You will likely spend a lot of your working life standing and lifting heavy materials, as well as climbing ladders and scaffolding to gain access to high work areas.