post

Energy Efficient Roofing

Roofing Wilmington DE is the surface that covers a building and protects it from rain, snow, sunlight, extreme temperatures, and wind. It also keeps pests like birds, squirrels, and raccoons out of your house.Roofing

Roofs are available in a variety of materials and styles. Homeowners can choose from shingles, tiles, metal, and wood.

A roof protects a building’s occupants, contents and structural elements from rain, snow, sunlight and extremes of temperature. Over the centuries, roofs have been designed in a variety of forms to accommodate specific technical, economic or aesthetic considerations.

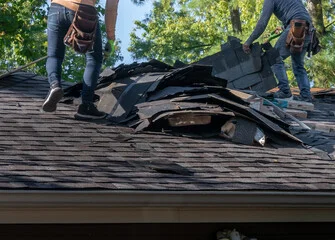
Roofing contractors must use proper personal protective equipment (PPE) to ensure the safety of their workers. Workers can be exposed to a variety of hazards, including falls from heights and exposure to heat produced by power tools. In addition, debris can fall on workers or get in their eyes. To minimize these hazards, employers should conduct regular toolbox talks and provide training on the risks associated with specific equipment or current weather conditions.

To prevent falls, contractors should install guardrails where work will be conducted within 15 feet of a roof’s edge. They should also implement and uphold a policy that forbids workers from approaching within this area without appropriate fall protection, such as harnesses, personal fall arrest systems or travel restraint systems.

Underlayment is a layer of water-resistant paper that’s placed over plywood sheathing and sealed with membrane and vapor barrier to prevent damage from moisture. It can be made from a variety of materials, including plastic and modern composite substances or metals such as copper, aluminum and lead. Flashing is sheet metal or other material installed at joints in a roof system to prevent water from infiltrating the structure. It can be made from polyethylene or other plastics, metals or modern composite materials.

Depending on the manufacturer, extended warranties are available that cover the entire roof system and offer additional coverage for specific periods. These warranties often include installation workmanship and material defects, offering peace of mind against unanticipated issues.

Durability

A roof is a vital part of any structure, providing protection from rain, snow, sunlight, and wind. Choosing durable roofing materials that can endure the elements translates into lower repair and replacement costs in the long run.

Durability also plays a critical role in ensuring that a building’s structure and its occupants remain safe from leaks and water damage. This is especially important since moisture can lead to structural damage, wood rot, mold growth, and other issues that impact the health and safety of a building’s inhabitants. Leaks are commonly caused by problems such as flashing, skylights, and plumbing vents, all of which can be easily fixed with a quick call to your local roofing contractor.

The durability of a roof is determined by the quality of its materials, as well as its installation standards and regular maintenance. Many of these factors are influenced by the weather conditions and climate of the area in which a building is located. In addition, a building’s owner may wish to add certain features, such as insulation, that can improve the overall durability of the roof.

Historically, asphalt shingles and wood shakes were the most popular roofing materials. However, as technology and environmental concerns have evolved, new options have become available. Modern roofing is made from a variety of materials, including corrugated metal and polycarbonate panels. Some of these are naturally resistant to corrosion, making them a good choice for coastal areas or regions with high humidity.

Other durable roofing materials include fiberglass, which offers superior strength and resistance to moisture. Other options are ceramic coatings, which reflect sunlight and reduce the amount of heat that is absorbed by the roof, and polymer-based formulations, which provide excellent resistance to chemical exposure.

Many of these roofing materials can be recycled, which further promotes sustainability. Durability is one of the main reasons why facility managers consider roofing to be a major component in their green construction efforts. Unfortunately, some roofs are thrown away prematurely due to a lack of adequate maintenance. To help avoid this, facility managers should ensure that their roofing is equipped with the right tools and training to perform regular inspections and repairs.

Aesthetics

Although it is important for roofs to provide protection and functionality, they also play an essential role in the aesthetics of a building. Homeowners and occupants alike derive personal satisfaction from living in a visually appealing building, and the right roof can provide a cohesive and pleasing architectural style that harmonizes with the surrounding environment. In addition, a roof can enhance the curb appeal of a property and contribute to its overall value. Some communities and homeowner associations even enforce roof aesthetic standards to maintain a uniform and attractive look in a neighborhood.

Aesthetic roofing materials and colors can make a huge impact on the look and feel of a building.

Energy Efficiency

There are many ways that homeowners and business owners can reduce their energy costs and environmental impact through home renovation projects, including installing solar panels and using efficient appliances. But perhaps the most effective and economical approach is through roof improvements that maximize a building’s energy efficiency.

The roof is a significant contributor to a building’s heating and cooling costs, so it makes sense that the roof would play a role in reducing its overall energy consumption. One way to do this is by implementing energy-efficient roofing solutions that help keep the indoor environment comfortable without overworking climate control systems.

Typically, energy-efficient roofs are made of reflective materials that absorb less heat than traditional materials. They also feature vents and fans that help to promote air movement, preventing trapped hot or cold spots in the indoor environment. Energy-efficient roofs can also be designed to incorporate insulation, which further reduces energy consumption and improves comfort.

It is important to note that energy-efficient roofs not only save money on energy bills, but they can also help to minimize the stress placed on electrical systems during peak demand times. As such, these roofs are a smart investment that can provide long-term cost savings.

Taking advantage of rebates and incentives offered by federal, state, and local governments can also help to make these roofs more affordable to install. Additionally, professional energy assessments can be conducted to identify the areas in a home where improvements are needed, allowing homeowners and businesses to better manage their energy use.

In addition to reducing energy costs and improving comfort, energy-efficient roofs also support environmental sustainability by minimizing greenhouse gas emissions and energy consumption. This is because fewer fossil fuels are used to power buildings, which in turn leads to lower carbon footprint and contributes to the fight against climate change.

While the roof may not be the first thing that comes to mind when thinking about green living, it can have a huge impact on a building’s energy efficiency and environmental impact. In order to reap the many benefits of a green living lifestyle, it is essential to have an energy-efficient roof that is made with sustainable materials.

post

Floating Or Conventional Dock Installation

A sturdier dock means a safer waterfront for your family. Whether you’re building a conventional or floating dock, it’s essential to use suitable materials to ensure its longevity. For example, hot-dipped galvanized fasteners are a must to avoid rusting.Dock Installation

To install the first section, float or carry it to its location and place it on the bracket. Slide the next standard assembly onto the pipe and about to the other side of the previous section. Click Here for more details.

Whether you have a conventional dock with posts that screw into the lake bottom or a floating dock you need to have some type of support system to anchor your dock. The most common support technology used by cottage owners is augers. There are a number of different auger styles and designs available from FLOE which allows you to choose the auger that works best with your particular bottom conditions.

If your lake bottom is very dense and does not allow for much penetration you may want to employ a mud auger that allows you to get a lot of traction in the lake bed. A mud auger essentially sits on the lake bottom and grabs onto it to hold your dock in place. If you have a rocky lake bottom you can also use a base pad that is designed to work in these types of conditions. Base pads come in a variety of shapes and sizes, cupped, square, and rectangular with many of these options featuring holes or spaces within the body of the pad to increase its “grip”.

Once you have an auger installed into one end of your dock pipe, loosen the leg lock bolts and lower your new dock section into the water. Using the auger wrench, turn the auger into the dock pipe until it is secured in your lake bottom. Then tighten the leg lock bolts.

Repeat this process with the rest of your new dock sections. Once you have your entire dock assembled you can add 3′ powder coated decorative post covers which snap on to the end of the dock pipes. If you have dock pipes that extend more than 34″ above the deck, you can also cut them with a saw or pipe cutter to the proper length for your specific dock layout.

Now that your basic dock is assembled it is time to enjoy your waterfront! You will want to float your dock for a few days to make sure it is level before you add the black post caps. Lastly, we recommend marking the bracket sleeve on each of your dock sections with a magic marker so that next year you know which section to put in first.

Alumi-Span’s Large Bottom Plates

In order to have a successful dock you need a system that not only works well but is also easy to install. The biggest thing is that the sections have to be light. If the sections aren’t light the installation is going to be a huge pain and will take a long time. Old splintery, hot all-wood dock sections typically weigh 200 – 250 pounds and even more when they’re wet. If you can afford it we recommend switching to aluminum or vinyl dock sections. Our maintenance free aluminum and cedar options still have the look of traditional stained wood but don’t require any of the sanding or painting.

If you’re on a lake that has a muck bottom installing the dock in the conventional manner means augering it in until it hits something solid which can be difficult and costly. The best way to deal with muck bottoms is to use large bottom plates. These plates allow the post to sink down through the muck but they don’t stop there so that you can get your dock up on the soft bottom.

These plates can clamp anywhere up and down the post (no unreliable thumb screw) and are available in many different sizes for a wide variety of situations. You can even get them in a “two piece” casting which allows you to push the dock pole in a bit further on mucky situations.

A large plate can be installed just as you would a permanent auger but it’s much easier since there is no digging to do. We like to start the process by loosening the bolts that hold the stringer brackets on each end of the crossarm. Then we put the first standard assembly on the bottom of the plate and slide the next section over it. This gives you a good idea of where the dock is and can help avoid getting it in the wrong place.

Once the standard assemblies are on the bottom of the plates you can lift up the top section of your dock and slide it on to the bottom plate and tighten the carriage bolts. You’ll then want to float the section out to the water to finish the rest of the assembly or carry it in on a boat.

Alumi-Span’s Floating Dock

A floating dock is a staple for many waterfront properties. It can increase a property’s value, provide safe boat and water access, and help improve the experience for those who use wheelchairs or have mobility challenges. However, the dock’s installation can be a daunting task for those without professional help. Some people even pay others to do their dock installation so they don’t have to deal with the backbreaking heavy lifting that goes along with it.

Docks can be made of a variety of materials, each with its own benefits and drawbacks. For example, all-aluminum and vinyl docks are the lightest and most maintenance free. They are also a good choice for residential properties. But some people prefer the look of cedar or treated pine. In fact, Alumi-Span offers a hybrid cedar-aluminum option that saves money while providing the durability of an aluminum dock.

The material you choose should also be based on where you are going to install your dock. The type of property you have will determine the amount of space you can use as well as any governmental restrictions or fees related to the dock structure. The location will also inform what accessories and features are a good idea, such as safety railings on exceptionally rough or deep waters, or storage boxes, benches, or ladders in recreational settings.

Another thing to keep in mind is how easy your new dock will be to assemble and disassemble for winter. A lift dock is a great solution for situations where ice movement may cause damage to your existing dock. It is a deck style platform that hinges to the land and has a set of stairs to allow you to get down to the water level. It then cranks up for the winter to reduce ice movement.

Lastly, it is important to find out how much your local government or homeowner’s association requires for dock construction and placement. Some jurisdictions require permits and have specific guidelines for sizes, types, and materials of the dock. These requirements should be taken into account as they will have a significant impact on the final cost of the dock and installation.

Alumi-Span’s Conventional Dock

Many homeowners who purchase dock sections are looking for something a bit more conventional than the Perma Augers or Floating Dock. They are looking for a dock that will stand up to the elements and withstand normal wear and tear. If that is the case for you, Praklet’s Piers and Lifts has the solution: Alumi-Span’s Conventional Dock.

The basic components of this style of dock are aluminum, so they will withstand the weather without rusting or warping. Alumi-Span’s Conventional dock also offers a variety of different finishes to help you achieve the look you desire for your waterfront property. From a basic aluminum to the darker wood grain appearance, you can find what you need with this type of dock section.

One of the best things about this style of dock is that it works well in shallow water depths. The minimum amount of water needed to put in this type of dock is three or four feet. This is a great option for people who live on an inland lake and want to avoid the hassle of putting in a dock in deep water, which can be challenging for those who are using waders or a boat.

A conventional dock from Alumi-Span is constructed with a standard end section, which features a hook on the side that attaches to the lip on the previous dock section. The standard end section is then repeated to create the straight run of your dock layout. This is the most commonly used section in a dock layout, and it provides the structure for the entire platform.

Another feature of the standard end section is that it includes a mounting plate, which can be placed on top of a dock post. This is a very useful feature, especially for people who live in areas that are prone to severe storms. This mounting plate prevents the dock from moving on the surface of the water during storms, and it also helps to reduce the risk of the foundation becoming weakened or damaged.

When the time comes to replace your dock, it is important to be aware of possible problems so that you can address them in a timely manner. For instance, foundation deterioration is not only dangerous, but it could also lead to the entire dock coming crashing down into the water at the slightest nudge. In cases where the foundation is seriously compromised, it may be necessary to have a total replacement of the entire dock.

post

Stucco Repair: What You Need to Know

Stucco Repair Philadelphia is something most homeowners with stucco houses will have to deal with at some point. It’s important to take care of it quickly to prevent further damage and keep costs down.Stucco Repair

Small cracks less than 1/4 inch can be filled in with acrylic exterior caulk. For cracks wider than that, a professional will need to use a cold chisel and hammer to widen the crack and bevel it.

Stucco is a durable material capable of lasting 100 years or more when it’s properly installed and maintained. But it can be damaged by many different things. Moisture is one of the most common causes. If your stucco is not caulked correctly around windows and doors, moisture can build up behind the material and cause mold, wood rot, and buckling. In addition, impacts from woodpeckers or stray baseballs can leave small chips in the surface, and your home’s settling can cause cracking.

If you notice any of these signs, it’s time to call a professional. A professional can inspect your stucco and recommend the best course of action. They will check for underlying issues, such as water damage, and repair or replace the affected materials. They can also help you choose the right color to match your existing stucco.

The cost of repairing stucco depends on the severity and extent of the damage. Large cracks, for example, can be much more costly to fix than smaller ones. Additionally, if the cracks are in hard-to-reach places, it will increase the overall cost of the project.

It’s important to choose a reputable contractor to perform your stucco repair. Be sure to look for testimonials and reviews. You should also make sure that your contractor is licensed and insured. This will protect you from scams and ensure that the job is completed to your satisfaction.

In addition to the cost of materials, you should also consider other associated costs. These may include labor setup time, mobilization charges, and minimum hourly charges. You should also add in any cost of removing, modifying, or repairing existing framing, surfacing, and/or HVAC, plumbing, or electrical systems to bring them up to code. Finally, don’t forget to include any permit or inspection fees that you might need to pay.

If you’re thinking of tackling a DIY stucco project, be aware that it can be very time-consuming and complicated. Even if you’re very handy, it’s often easier to hire a professional to handle the work for you. Not only will this save you time, but it will also prevent costly mistakes that could cost you a lot of money down the road.

Materials

Stucco is a popular exterior finish for homes, but it requires regular maintenance. Moisture is one of the biggest culprits in plaster deterioration. It enters a building through cracks, around chimneys, and window and door openings. It can also get behind lath that is torn or not properly lapped at the seams.

When moisture is allowed to enter the home, it can lead to mildew and mold, ugly discoloration on the outside, and wall rot that can destroy the structural integrity of the walls. The most common way to manage moisture is by installing an air barrier, but even if you have done this, it can be difficult to know what to do when water leaks into your home’s plaster.

The best way to avoid water damage is to make sure that all cracks are closed with waterproof caulking. This is an easy DIY project that can save you money on repair costs. A standard caulking kit from Quikrete costs about $30 and includes everything you need to repair hairline cracks.

To start your stucco repair, remove any loose flakes of paint from the surface. Then, use the wire brush to clean the area around the crack. This will help the new stucco patch stick better. You should also vacuum up any dust that has accumulated in the cracks. Finally, spray the area with water to moisten the surface and prepare it for patching.

If you’re not comfortable doing the job yourself, you can hire a professional to handle it for you. It’s important to work with a contractor that has experience with stucco repairs and can offer you a warranty for their work.

Before starting the repair, it’s important to protect yourself by wearing a face mask and safety glasses. Using a hammer and cold chisel, widen the crack to at least a quarter inch and remove any loose pieces of stucco. It’s also a good idea to remove any damaged wire mesh lath that may be present.

Once the crack is widened, cut a piece of grade-D builder’s paper to fit the size of the repair area and secure it to the sheathing with roofing nails. Next, add a piece of fiberglass or galvanized metal lath and trim it to fit the opening with tin snips.

Safety

A stucco repair expert must be careful not to damage the surrounding area during this project. This can cause the cracks in your stucco to widen, which could result in even more damage. It is also important that the weather conditions be ideal for this project. Stucco can’t be worked on if it’s too cold or too hot, as this will affect how well the cement and water mix. This can lead to poor-quality repairs and may even make the problem worse.

A good way to assess the condition of your stucco is to look for cracks and chips. These signs indicate that the weather is starting to wear away at the surface, and it’s time for a stucco repair. You should also check for leaking areas and any moisture problems in the building’s sheathing, insulation, and framing. These are major issues that can lead to rot, mold growth, and structural problems.

Another sign that it’s time to call in a stucco repair professional is if your walls are showing signs of wildlife damage. Termites, squirrels, woodpeckers, and other creatures have been known to munch on stucco, leaving holes that can cost thousands of dollars in damages each year. This can be avoided if you spot any damage early and have it addressed as soon as possible.

Gaps around windows and doors are another sign that the stucco needs to be repaired. These gaps allow moisture to seep into the walls, which can lead to water damage and other problems. A stucco repair expert should be able to seal these gaps and prevent further moisture intrusion.

When repairing stucco, it’s important to use a high-quality material. This will ensure that the patch you install is long-lasting and durable. It’s also a good idea to buy a stucco repair mix that can be easily tinted. This will help you match the color of your existing stucco and give it a consistent appearance.

If you’re planning to do the staining and painting yourself, it’s best to choose a waterproof material. This will protect the underlying framing and sheathing from moisture damage and prevent mold and rot from growing. It will also make it easier for you to maintain your new stucco.

Time

Stucco repair can take a while because the process is more involved than simply patching a small crack or hole. A stucco professional may need to remove old plaster, apply a base coat, and then add the final coats of stucco. These steps can be very time-consuming and often require the use of special tools. The location of the damaged areas can also affect the amount of time that it takes to complete a stucco repair project. For example, if the damage is on the second or third story of a home, then the stucco professional will need to climb ladders and scaffolding to access the area. This can increase the cost of the project and add to the overall timeline.

In addition to the time needed to perform the actual repair work, it can also take a while for the plaster to dry. This is because the stucco must cure completely before it can be painted or otherwise finished. Typically, this process can take between 24 and 72 hours, depending on the weather conditions.

If a homeowner wants to speed up the drying process, they can spray the stucco with water or another liquid. However, this method is only recommended for minor cracks that are less than 1/16 of an inch in width. It should not be used to repair larger cracks or holes, which can cause structural problems for the home.

When stucco becomes chipped or crumbling, it should be inspected by a stucco repair professional immediately. This is because it could be a sign of water damage, foundation settling, or a pest infestation.

Moisture penetration through cracks in the stucco can lead to water damage, rot, and mold growth. Leaving the problem untreated can lead to expensive repairs and potential health issues for a homeowner.

A homeowner should look for signs of moisture penetration, including a musty or sour smell, soft spots, or indentations. The homeowner should also check the structure of the home for leaks or a foundation issue. There are surface scanners available that can be run over the stucco to determine moisture levels. However, these are not entirely accurate or definitive and should be used in conjunction with invasive testing.

post

The Importance of Roof Services

Roofing company can perform roof maintenance essential for commercial and residential properties. Inspecting your home’s roof is a great way to prevent problems before they become big ones. Various activities should be performed on your roof regularly, including repairing small leaks, ensuring that the shingles are secure, checking for mold, and performing annual inspections. In addition to the above tasks, you should also check for rot, cracking, and water stains inside your building. This will require extra attention when inspecting your home’s roof. If there are signs of these issues, it may be time to replace your roof.


A common problem with roofs is accumulated dirt. Dirt, oil, grease, and other debris can build up on the surface of the roof and damage its materials. You should take care of any fallen tree limbs on your property. This can cause problems with your roof’s membranes and elements. If you notice branches on your property frequently, you may need to get tree maintenance to keep them from falling on your roof. Make sure to report any problems to the owner immediately.

A checklist should include all aspects of roof maintenance. Inspect roof elements for aging, structural damage, and deterioration. If a component is bent, missing, or in need of repair, it should be inspected. Pipes and equipment supports should be checked for sagging and cracked bases. If support is digging into the roof membrane, it needs to be replaced. You should also check the drainage system for clogged gutters.

If you are a homeowner, you should have trained roofing professionals do a thorough inspection of your roof at least twice a year. Having regular inspections performed by a professional is essential for avoiding major repairs and replacing damaged roof elements. A good contractor will know the proper way to do these jobs and will make the whole process as easy as possible for you. You should also have a written record of the inspection process. Once a professional has done the job, the roof should be in top shape in no time.

Roof maintenance should not only include cleaning the roof but should also include preventing problems and repairing minor damages. It is also important to keep the drains clean and free of debris. This is necessary because dirt clogs drain and damage the roof’s components. Additionally, you should clean the roofs. Ensure that mechanical equipment is working properly. It should be free of debris. This is especially important for commercial properties. You should avoid allowing any fallen branches to affect your home.

Depending on the type of roofing material on your home, the maintenance of your roof can be done yourself or by a professional. The best way to do this is to hire a qualified roofing company. It is best to contact a professional if you don’t have the time to do it yourself, as the risk of damaging the structure of your home is greater. Likewise, you should consider the warranty of your home’s roof if you plan to handle the repair yourself.

During the rainy season, it is critical to keep the roof clear of debris. A leaking roof can be a source of dangerous bacteria. In addition to causing structural damage, a moss-covered roof is a potential source of a host of diseases and ailments. If you notice any of these problems on your home, you need to contact a professional immediately. So, don’t let water damage ruin your property.

Inspecting your roof is a vital part of proper home maintenance. It is important to make sure that you do not neglect this part of the house. During the winter months, the roof can become damaged by snow and rain. During the summer, a leaky roof can lead to structural damage. If water has flooded your home, you should consider hiring a professional for repair work. This will prevent the risk of a disaster affecting your home.

Performing a roof inspection is an important part of the checklist. If you aren’t sure what to look for, hire a professional to come to your home. They will be able to assess any weather-related problems and advise you on the appropriate steps to take to maintain your home’s roof. The inspections should be conducted every few years, and they should be completed in the fall and spring. As with any other part of a home, roof inspections should be done before and after the winter season.